Showing posts with label Letter. Show all posts

How to Write a Formal Letter?


Here are the steps to follow when writing a formal letter:

  1. Begin with the date: At the top of the letter, write the date on which the letter is being written. This can be written in a variety of formats, such as "January 1, 2021" or "1/1/21."

  2. Add the recipient's address: Below the date, write the recipient's address, including their name, title (if applicable), company (if applicable), and full mailing address.

  3. Add a subject line: Below the recipient's address, include a subject line that briefly describes the purpose of the letter. For example, "Application for the position of Marketing Coordinator."

  4. Begin the letter with a proper salutation: Start the body of the letter with a proper salutation, such as "Dear [Name]" or "To Whom It May Concern."

  5. Write the body of the letter: The body of the letter should clearly state the purpose of the letter, using concise and professional language.

  6. End the letter with a closing: End the letter with a closing, such as "Sincerely," followed by a comma and your signature.

  7. Include your contact information: After your signature, include your contact information, including your name, title, and mailing address.

Overall, a formal letter should be well-organized, clear, and professional. It should include all of the necessary information, such as the date, the recipient's address, and a subject line, and should be written in a polite and respectful tone.

How to Insert a Signature in Word for Mac?


Microsoft Word for Mac is a word processing software program that is part of the Microsoft Office suite of productivity tools. It is designed for use on Apple Macintosh computers, and offers many of the same features and functions as the Windows version of Microsoft Word.

With Microsoft Word for Mac, users can create, edit, and collaborate on a variety of document types, including reports, presentations, letters, and resumes. It offers a range of tools and features that make it easy to use, including spell check, auto-save, and automatic formatting.

One of the key features of Microsoft Word for Mac is its collaboration capabilities. This allows multiple users to work on a document at the same time, and see each other's changes as they are made. This makes it ideal for teams and groups who need to work together on a project or document.

In addition to its collaboration capabilities, Microsoft Word for Mac also offers a range of formatting and layout options, including different font and paragraph styles, as well as the ability to insert images, tables, and other media into your documents. It also integrates with other Microsoft Office tools, such as Excel and PowerPoint, allowing users to easily combine their documents with data from spreadsheets and presentations.

Overall, Microsoft Word for Mac is a word processing software program that is designed for use on Apple Macintosh computers. It offers a range of tools and features that make it easy to use, and integrates with other Microsoft Office tools.

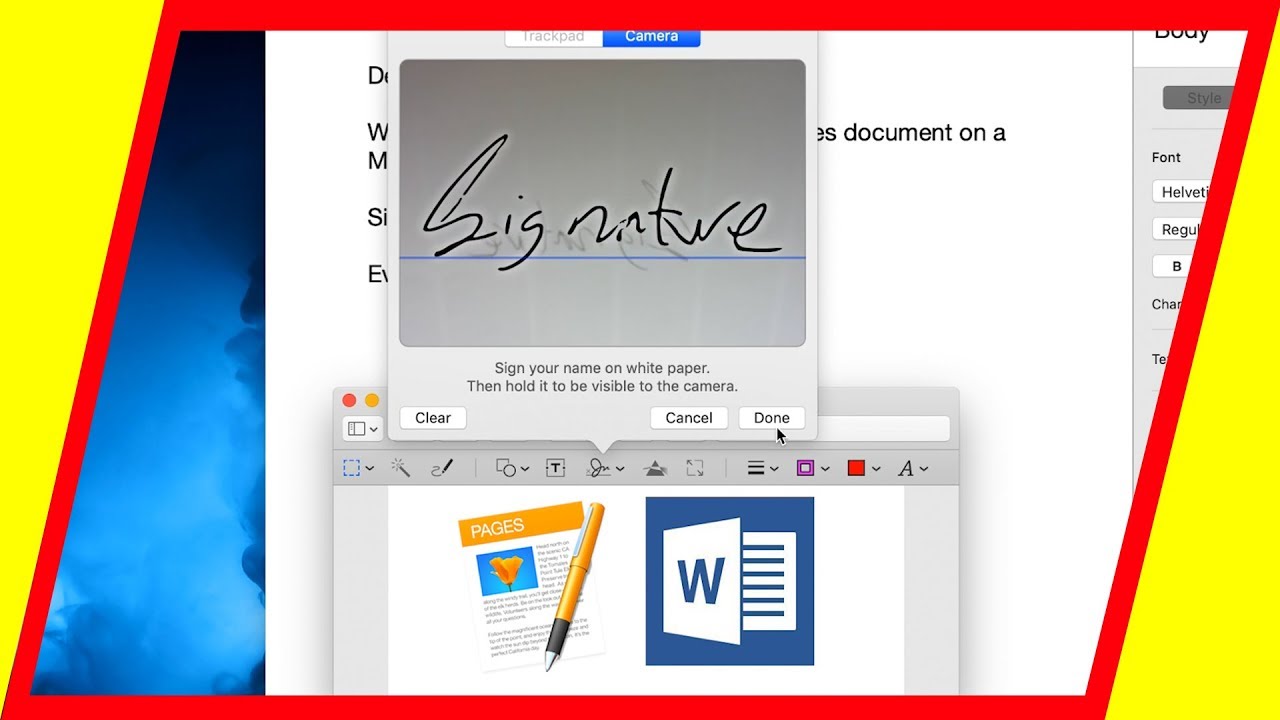
How to Insert a Signature in Word for Mac?


To insert a signature in Word for Mac, you will need to follow these steps:

  1. Open the Microsoft Word for Mac document where you want to insert the signature.

  2. Click on the "Insert" tab at the top of the screen.

  3. In the "Illustrations" section, click on the "Pictures" option.

  4. Browse to the location of your signature image, select it, and then click on the "Insert" button.

  5. The signature image will be inserted into your document. You can click and drag the corners of the image to resize it, or click and drag the center of the image to move it to a different location in your document.

  6. To save the signature image, click on the "Save" button in the top-left corner of the screen.

Overall, to insert a signature in Word for Mac, you will need to click on the "Insert" tab, choose the "Pictures" option, and then browse to the location of your signature image. You can then click and drag the image to the desired location in your document, and save your changes.

How to Insert a Text Box in Google Docs?


Google Docs is a free online word processing tool that is part of the Google Workspace suite of productivity tools. It allows users to create, edit, and collaborate on documents in real-time, from any device with an internet connection.

With Google Docs, users can create a variety of document types, including reports, presentations, letters, and resumes. They can also add text, images, and other media to their documents, as well as format and style their text using a range of font and paragraph options.

One of the key features of Google Docs is its real-time collaboration capabilities. This allows multiple users to work on a document at the same time, and see each other's changes as they are made. This makes it ideal for teams and groups who need to work together on a project or document.

In addition to its collaboration capabilities, Google Docs also offers a range of tools and features that make it easy to use, such as spell check, auto-save, and automatic formatting. It also integrates with other Google Workspace tools, such as Google Sheets and Google Slides, allowing users to easily combine their documents with data from spreadsheets and presentations.

Overall, Google Docs is a free online word processing tool that allows users to create, edit, and collaborate on documents in real-time. It offers a range of tools and features that make it easy to use, and integrates with other Google Workspace tools.

How to Insert a Text Box in Google Docs?


To insert a text box in Google Docs, you will need to follow these steps:

  1. Open the Google Docs document where you want to insert the text box.

  2. Click on the "Insert" tab at the top of the screen.

  3. In the "Drawing" section, click on the "Text box" option.

  4. A new text box will be inserted into your document. You can click and drag the corners of the text box to resize it, or click and drag the center of the text box to move it to a different location in your document.

  5. Click inside the text box and start typing your text. You can use the formatting options at the top of the screen to adjust the font, size, color, and other attributes of your text.

  6. To save the text box, click on the "Save and Close" button in the top-right corner of the text box.

Overall, to insert a text box in Google Docs, you will need to click on the "Insert" tab, choose the "Text box" option, and then click and drag the text box to the desired location in your document. You can then type your text and use the formatting options to adjust the appearance of your text.

How to Write a Two Weeks Notice Letter?


A notice letter is a written document that is used to inform or notify someone of something. Notice letters can be used for a variety of purposes, such as to inform someone of a change in policy, to provide notice of an upcoming event, or to notify someone of a problem that needs to be addressed.

Notice letters typically follow a standard format, which includes the following elements:

  • The sender's contact information, including their name, address, phone number, and email address
  • The recipient's contact information, including their name, address, and title (if applicable)
  • A clear and concise subject line that summarizes the purpose of the letter
  • A salutation, such as "Dear [Recipient's Name]"
  • The body of the letter, which provides the necessary information and details about the subject of the letter
  • A closing, such as "Sincerely" or "Best regards," followed by the sender's signature and name

Notice letters should be written in a professional and respectful tone, and should provide clear and concise information. They should also be sent in a timely manner, so that the recipient has sufficient time to respond or take action if necessary.

Overall, a notice letter is a written document that is used to inform or notify someone of something. Notice letters typically follow a standard format, and should be written in a professional and respectful tone.

How to Write a Two Weeks Notice Letter?


To write a two weeks notice letter, you will need to follow these steps:

  1. Start by identifying the recipient of the letter. This should be your employer, or the person who is responsible for managing your employment.

  2. Include your contact information, as well as the recipient's contact information, at the top of the letter. This should include your name, address, phone number, and email address, as well as the recipient's name, title, and contact information.

  3. Create a clear and concise subject line that summarizes the purpose of the letter. For example, you could use a subject line such as "Two Weeks Notice" or "Resignation Notice."

  4. Begin the letter with a salutation, such as "Dear [Recipient's Name]."

  5. In the body of the letter, provide a brief explanation of why you are resigning and when your last day of work will be. Be sure to include the date that you will be leaving, as well as any other relevant information.

  6. Thank your employer for the opportunity to work with them, and express your willingness to help with the transition process.

  7. Close the letter with a professional closing, such as "Sincerely" or "Best regards," followed by your signature and name.

Overall, to write a two weeks notice letter, you will need to include your contact information, the recipient's contact information, a clear subject line, a salutation, a brief explanation of your resignation, a professional closing, and your signature and name. This letter should be written in a professional and respectful tone, and should be sent in a timely manner.

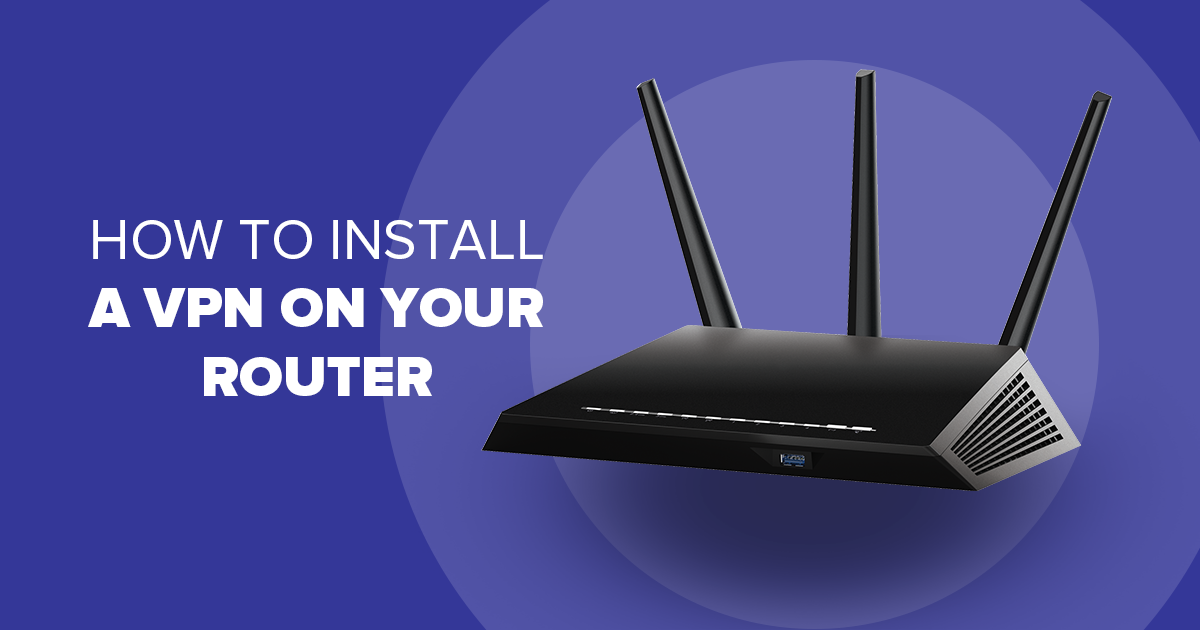
How to Set Up a VPN on Your Router?


A VPN, or virtual private network, is a type of technology that allows users to create a secure connection to another network over the internet. VPNs are often used to protect online privacy and security, and can also be used to access content or services that are restricted in certain geographical locations.

When a user connects to a VPN, their internet connection is routed through an encrypted tunnel to a VPN server. This encrypts the user's internet traffic, protecting it from being intercepted or monitored by third parties. The VPN server then forwards the traffic to the internet, making it appear as if the user's device is located in the same location as the VPN server.

To use a VPN, you will need to sign up for a VPN service and install the VPN software on your device. Once the VPN is installed, you can connect to a VPN server and start using the internet securely and privately.

Overall, a VPN is a technology that allows users to create a secure and private connection to the internet. VPNs are often used to protect online privacy and security, and can also be used to access restricted content or services. To use a VPN, you will need to sign up for a VPN service and install the VPN software on your device.

How to Set Up a VPN on Your Router?

To set up a VPN on your router, you will need to follow these steps:

  1. Choose a VPN service and sign up for an account. There are many different VPN services available, and each one offers different features and pricing plans. Choose a VPN service that fits your needs and sign up for an account.

  2. Download and install the VPN software on your router. Most VPN services will provide instructions for installing the VPN software on your router. Follow these instructions to download and install the VPN software on your router.

  3. Configure the VPN settings on your router. Once the VPN software is installed on your router, you will need to configure the VPN settings, such as the VPN server you want to connect to and the VPN protocol you want to use.

  4. Connect your devices to the VPN. Once the VPN is configured on your router, all devices that are connected to your home network will be protected by the VPN. You can connect your devices to the VPN by choosing the VPN network in your device's network settings.

Overall, setting up a VPN on your router involves choosing a VPN service, installing the VPN software on your router, configuring the VPN settings, and connecting your devices to the VPN. By following these steps, you can set up a VPN on your router and protect all of your devices on your home network.

The Best Platform For Trading Forex


Trading forex, also known as foreign exchange trading or currency trading, involves buying and selling currencies in the foreign exchange market. The forex market is the largest and most liquid financial market in the world, with a daily trading volume of over $5 trillion.

Traders in the forex market can make money by buying and selling currencies based on movements in their exchange rates. For example, if a trader believes that the value of the US dollar will increase against the euro, they can buy dollars and sell euros in the market, and then close the position at a later time when the exchange rate has moved in their favor.

To start trading forex, you will need to open a trading account with a forex broker. Forex brokers are financial institutions that provide access to the forex market, allowing you to buy and sell currencies online. Once you have a trading account, you can deposit funds and start trading currencies using the broker's online trading platform.

Overall, trading forex involves buying and selling currencies in the foreign exchange market in order to profit from movements in their exchange rates. To start trading forex, you will need to open a trading account with a forex broker and deposit funds.


The best platform for trading forex will depend on your individual needs and preferences. There are many different forex trading platforms available, and each one offers different features and benefits. Here are some factors to consider when choosing the best platform for trading forex:

  1. Ease of use. The platform should be easy to use, with a user-friendly interface and clear instructions for making trades.

  2. Trading tools and features. The platform should offer a range of trading tools and features, such as charting and technical analysis tools, news and market analysis, and access to multiple currency pairs.

  3. Regulation and security. The platform should be regulated by a reputable financial authority, and should have strong security measures in place to protect your funds and personal information.

  4. Fees and commissions. The platform should have competitive fees and commissions, and should not charge hidden fees or markups on your trades.

  5. Customer support. The platform should offer good customer support, with multiple ways to contact the company and get help when needed.

Overall, the best platform for trading forex will depend on your individual needs and preferences. Look for a platform that is easy to use, offers a range of trading tools and features, is regulated and secure, has competitive fees and commissions, and offers good customer support.

MetaTrader 4


MetaTrader 4 (MT4) is a popular forex trading platform developed by the Russian software company MetaQuotes. MT4 is widely used by forex traders and brokers worldwide, and offers a range of features and tools for trading currencies and other financial instruments in the forex market.

Some of the key features of MT4 include:

  • Advanced charting and technical analysis tools, including more than 50 built-in indicators and the ability to create custom indicators

  • Support for automated trading, allowing traders to use Expert Advisors (EAs) to automate their trading strategies

  • A user-friendly interface with multiple languages and customizable layouts

  • A range of order types, including market, limit, and stop orders

  • Support for multiple currency pairs and other financial instruments, including stocks, futures, and options

  • Access to a large community of traders and developers, with a range of third-party add-ons and tools available

Overall, MetaTrader 4 is a widely used and well-respected forex trading platform that offers a range of advanced features and tools for traders. It is known for its user-friendly interface and support for automated trading, making it a popular choice among forex traders.

MetaTrader 4 for Mac


MetaTrader 4 (MT4) is a popular forex trading platform that is available for Mac users. MT4 is developed by the Russian software company MetaQuotes, and offers a range of features and tools for trading currencies and other financial instruments in the forex market.

To use MT4 on a Mac, you will need to download and install the MT4 for Mac software from the MetaQuotes website. This software is specifically designed for Mac computers, and provides the same features and tools as the Windows version of MT4.

Once you have installed MT4 for Mac, you can log in to your trading account and start using the platform to trade currencies and other financial instruments. The platform offers a user-friendly interface and a range of advanced charting and technical analysis tools, as well as support for automated trading using Expert Advisors (EAs).

Overall, MetaTrader 4 for Mac is a powerful and user-friendly forex trading platform that is available for Mac users. It offers the same features and tools as the Windows version of MT4, and is a popular choice among forex traders who use Mac computers.

IG Markets

IG Markets, also known as IG Group or IG.com, is a global financial services company that offers a range of products and services, including forex trading, contracts for difference (CFDs), stock trading, and spread betting.

IG Markets is headquartered in London, UK, and is regulated by the Financial Conduct Authority (FCA) in the UK. The company was founded in 1974, and is now one of the world's largest online trading providers, serving clients in over 180 countries.

IG Markets offers a range of forex trading platforms, including the popular MetaTrader 4 (MT4) platform, as well as its own proprietary trading platform, IG Trading. The company offers a range of forex pairs, including major, minor, and exotic currencies, and provides access to a range of educational resources and trading tools for traders.

Overall, IG Markets is a well-established and reputable financial services company that offers a range of products and services, including forex trading. The company is regulated by the FCA in the UK, and offers a range of platforms and tools for traders.

Free Learn How-To Tutorials

Search This Blog

Menu Halaman Statis

About Me